

In the realm of home construction and renovation, plumbing plays a crucial role in ensuring the comfort and functionality of various spaces, and the bathroom is no exception. Behind the scenes of a well-designed and fully functional bathroom lies a complex system of pipes, drains, and fixtures that must be meticulously planned and installed. This is where a bathroom plumbing diagram for rough-in comes into play.
Understanding to Bathroom Plumbing Rough-In
Bathroom plumbing rough-in refers to the initial phase of plumbing installation during construction or renovation, where the foundational elements of the plumbing system are put in place. This includes positioning pipes, drains, water supply lines, and ventilation systems before the walls and floors are sealed. A well-executed rough-in ensures that once the bathroom fixtures are installed, everything functions seamlessly.
The Importance of a Plumbing Diagram
A plumbing diagram is like a blueprint for the bathroom’s plumbing system. It provides a visual representation of how all the components will be connected and interact. Having a plumbing diagram is crucial for multiple reasons:
- Clarity: A diagram clearly shows the layout, making it easier to understand the entire system.
- Accuracy: It helps avoid mistakes during installation, saving time and resources.
- Compliance: A well-designed plumbing diagram ensures compliance with building codes and regulations.
Components of a Bathroom Plumbing Diagram
Main Water Supply Line
The main water supply line delivers cold and hot water to the bathroom fixtures. It’s essential to ensure proper pipe sizing and pressure regulation for adequate water flow.
Drainage System
The drainage system consists of pipes that carry wastewater away from the fixtures. Proper slope and venting prevent clogs and allow for efficient drainage.
Ventilation System
Vent pipes ensure the smooth flow of air through the plumbing system, preventing airlocks and facilitating proper drainage. They also help eliminate odors.
Fixture Placement
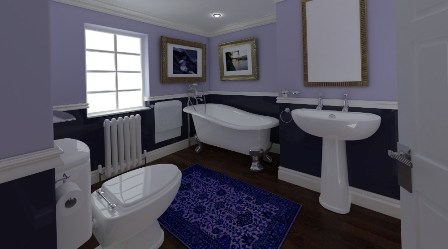
The plumbing diagram indicates where each fixture, such as the toilet, sink, bathtub, or shower, will be placed. Proper placement ensures convenience and functionality.
Steps for Creating a Bathroom Plumbing Diagram
Measure and Plan
Accurate measurements of the bathroom space are essential. A scaled sketch helps in visualizing the layout and positioning of fixtures.
Locate Fixtures
Identify where each fixture will be placed. Consider factors like convenience, aesthetics, and accessibility.
Determine Pipe Routes
Plan the routes for supply and drainage pipes. Minimize bends and turns to maintain water pressure and prevent clogs.
Plan Ventilation
Decide on the placement of vent pipes. Proper venting prevents water traps and allows gases to escape.
Common Mistakes to Avoid
Insufficient Slope
Inadequate slope in drain pipes can lead to water pooling and slow drainage. Proper slope ensures quick and efficient wastewater removal.
Incorrect Venting
Improper venting can cause gurgling drains and trap air in the system, impeding proper drainage.
Poor Fixture Placement
Placing fixtures too close together or too far apart can affect functionality and aesthetics. It’s essential to find the right balance.
Importance of Professional Plumbing Services
While DIY projects can be rewarding, plumbing rough-in is a complex task best left to professionals. They have the expertise to create accurate plumbing diagrams, ensuring a well-functioning system and compliance with regulations.
FAQs
Here are some FAQs related to Bathroom Plumbing Diagram for Rough In
Rough-in plumbing for a bathroom refers to the initial installation phase where essential plumbing components, such as pipes, drains, and supply lines, are positioned before walls and fixtures are added. It forms the foundational structure of the plumbing system.
The standard bathroom rough-in height typically refers to the height at which the drain and supply lines are installed in relation to the finished floor. It often ranges from 18 to 20 inches for toilets and around 24 inches for sinks.
Roughing in a bathroom toilet involves installing the waste and supply lines for the toilet. The waste pipe is positioned to connect with the toilet’s drainage outlet, and the supply line is connected to the water source. Proper measurements and alignment are crucial to ensure functionality.
Running rough-in plumbing involves installing the foundational plumbing components in a structure before adding walls, floors, and fixtures. This includes positioning drainage pipes, water supply lines, and vent pipes according to the plumbing design.
Rough-in piping refers to the installation of pipes and tubing that form the infrastructure of a plumbing system. These pipes are placed before the finishing touches are added to a building, ensuring that the necessary plumbing connections are in place.
What are the 3 phases of plumbing?
The three phases of plumbing are:
- Rough-In: This phase involves installing the basic plumbing infrastructure, including pipes, drains, and supply lines, before the walls and fixtures are installed.
- Top-Out: During this phase, the pipes and lines that will be concealed within walls and floors are connected to fixtures, such as faucets and toilets.
- Trim-Out: In this final phase, fixtures are fully installed, including faucets, toilets, and other bathroom elements. The plumbing system is tested for functionality and leaks.
Remember that these answers provide a general overview, and specific situations might require variations or additional details. Always consult with a professional plumber for accurate and tailored guidance.